How to set up AWS storage
Agiled stores your file in default Agiled storage that comes with your plan. However, you can also set up AWS to use your own storage.
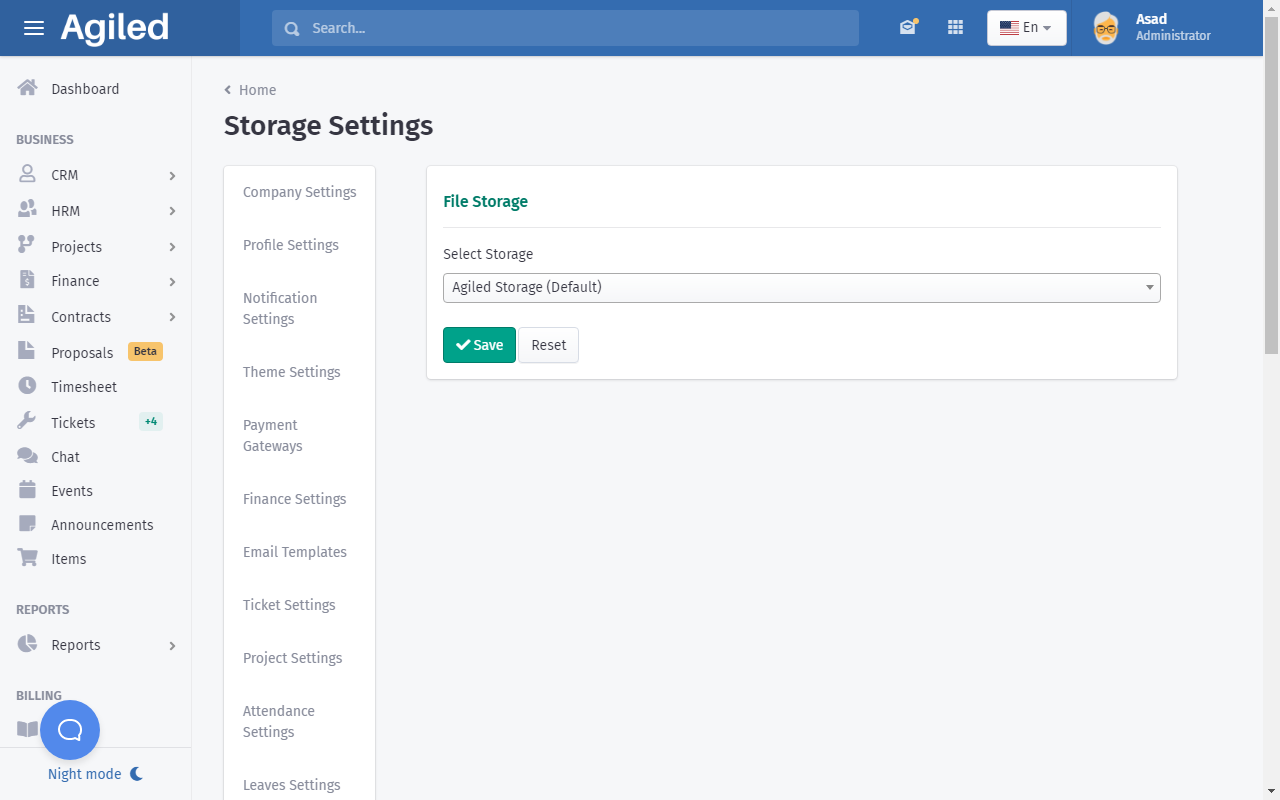
To setup AWS storage go to Settings - Storage Settings and choose AWS from the drop down.
You will need some AWS credentials to use AWS storage like
- AWS Key : This is the access key from your AWS account.
- AWS Secret : This is access secret from your AWS account.
- AWS Region: This is the Bucket Region.
- AWS Bucket: This is Bucket URL
Here are some articles to help you in getting your AWS credentials.
https://aws.amazon.com/blogs/security/wheres-my-secret-access-key/
https://docs.aws.amazon.com/general/latest/gr/aws-sec-cred-types.html
https://supsystic.com/documentation/id-secret-access-key-amazon-s3/
Important note about Region Name:
When adding region in the settings, please use region code as shown in the second column of the table below. Like for US East (N. Virginia), you need to add us-east-1 in the settings.
Region Name
Region
Endpoint
Protocol
US East (Ohio)
us-east-2
rds.us-east-2.amazonaws.comrds-fips.us-east-2.amazonaws.com
HTTPSHTTPS
US East (N. Virginia)
us-east-1
rds.us-east-1.amazonaws.comrds-fips.us-east-1.amazonaws.com
HTTPSHTTPS
US West (N. California)
us-west-1
rds.us-west-1.amazonaws.comrds-fips.us-west-1.amazonaws.com
HTTPSHTTPS
US West (Oregon)
us-west-2
rds.us-west-2.amazonaws.comrds-fips.us-west-2.amazonaws.com
HTTPSHTTPS
Africa (Cape Town)
af-south-1
rds.af-south-1.amazonaws.com
HTTPS
Asia Pacific (Hong Kong)
ap-east-1
rds.ap-east-1.amazonaws.com
HTTPS
Asia Pacific (Mumbai)
ap-south-1
rds.ap-south-1.amazonaws.com
HTTPS
Asia Pacific (Osaka-Local)
ap-northeast-3
rds.ap-northeast-3.amazonaws.com
HTTPS
Asia Pacific (Seoul)
ap-northeast-2
rds.ap-northeast-2.amazonaws.com
HTTPS
Asia Pacific (Singapore)
ap-southeast-1
rds.ap-southeast-1.amazonaws.com
HTTPS
Asia Pacific (Sydney)
ap-southeast-2
rds.ap-southeast-2.amazonaws.com
HTTPS
Asia Pacific (Tokyo)
ap-northeast-1
rds.ap-northeast-1.amazonaws.com
HTTPS
Canada (Central)
ca-central-1
rds.ca-central-1.amazonaws.comrds-fips.ca-central-1.amazonaws.com
HTTPSHTTPS
China (Beijing)
cn-north-1
rds.cn-north-1.amazonaws.com.cn
HTTPS
China (Ningxia)
cn-northwest-1
rds.cn-northwest-1.amazonaws.com.cn
HTTPS
Europe (Frankfurt)
eu-central-1
rds.eu-central-1.amazonaws.com
HTTPS
Europe (Ireland)
eu-west-1
rds.eu-west-1.amazonaws.com
HTTPS
Europe (London)
eu-west-2
rds.eu-west-2.amazonaws.com
HTTPS
Europe (Milan)
eu-south-1
rds.eu-south-1.amazonaws.com
HTTPS
Europe (Paris)
eu-west-3
rds.eu-west-3.amazonaws.com
HTTPS
Europe (Stockholm)
eu-north-1
rds.eu-north-1.amazonaws.com
HTTPS
Middle East (Bahrain)
me-south-1
rds.me-south-1.amazonaws.com
HTTPS
South America (São Paulo)
sa-east-1
rds.sa-east-1.amazonaws.com
HTTPS
AWS GovCloud (US-East)
us-gov-east-1
rds.us-gov-east-1.amazonaws.comrds.us-gov-east-1.amazonaws.com
HTTPSHTTPS
AWS GovCloud (US)
us-gov-west-1
rds.us-gov-west-1.amazonaws.comrds.us-gov-west-1.amazonaws.com
HTTPSHTTPS
After getting your keys, bucket name and region from AWS, paste them in Agiled AWS settings and click Save.
All the files you upload from this point will be saved in your own AWS storage.
Here is some help about how you can create your bucket in Amazon S3
Creating S3 Bucket
-
Login to Amazon Console.
-
From services section Select S3.
-
Click on “Create Bucket” button and following screen will appear.
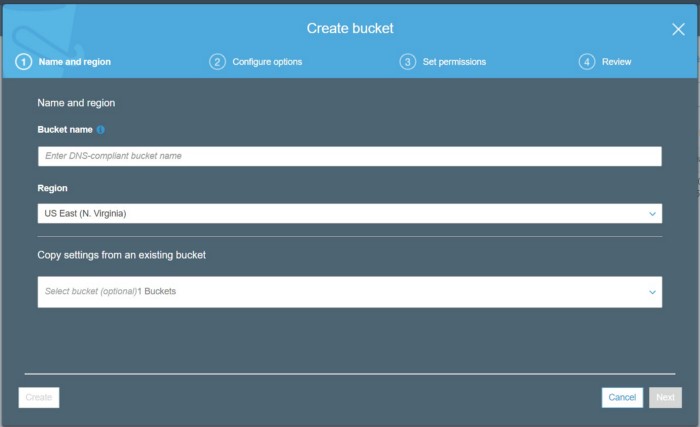
-
Enter Bucket Name, Region and click “Next”.
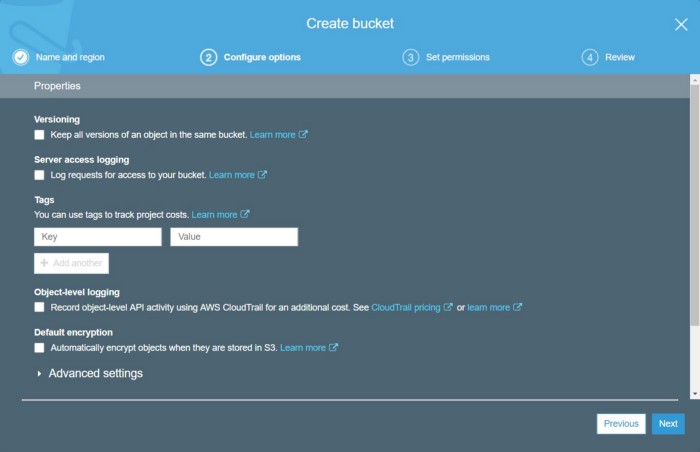
For Now, don’t need to change above settings. Just click “Next”.
5. Uncheck all options as shown in screenshot below.
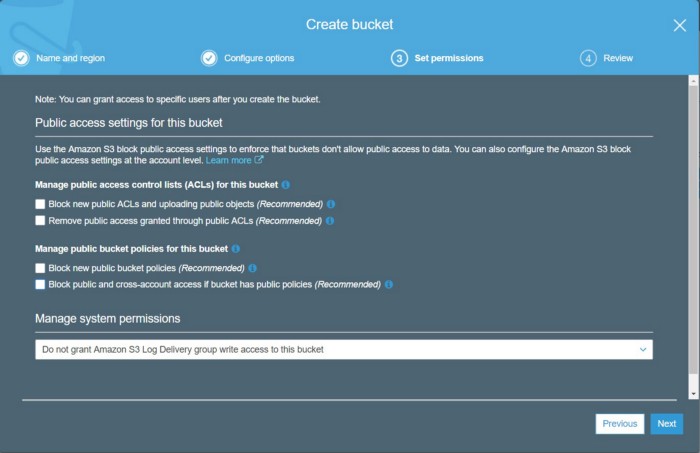
Click on Next, review settings and click button Create Bucket.
Now you have your bucket created but you need to assign to it a B****ucket Policy.
Here is how you can create and add a bucket policy.
1. Go to this link https://awspolicygen.s3.amazonaws.com/policygen.html and choose bucket policy from the dropdown. To generate a proper policy you need to get the following image and select DeleteObject, GetObject, and PutObject as actions
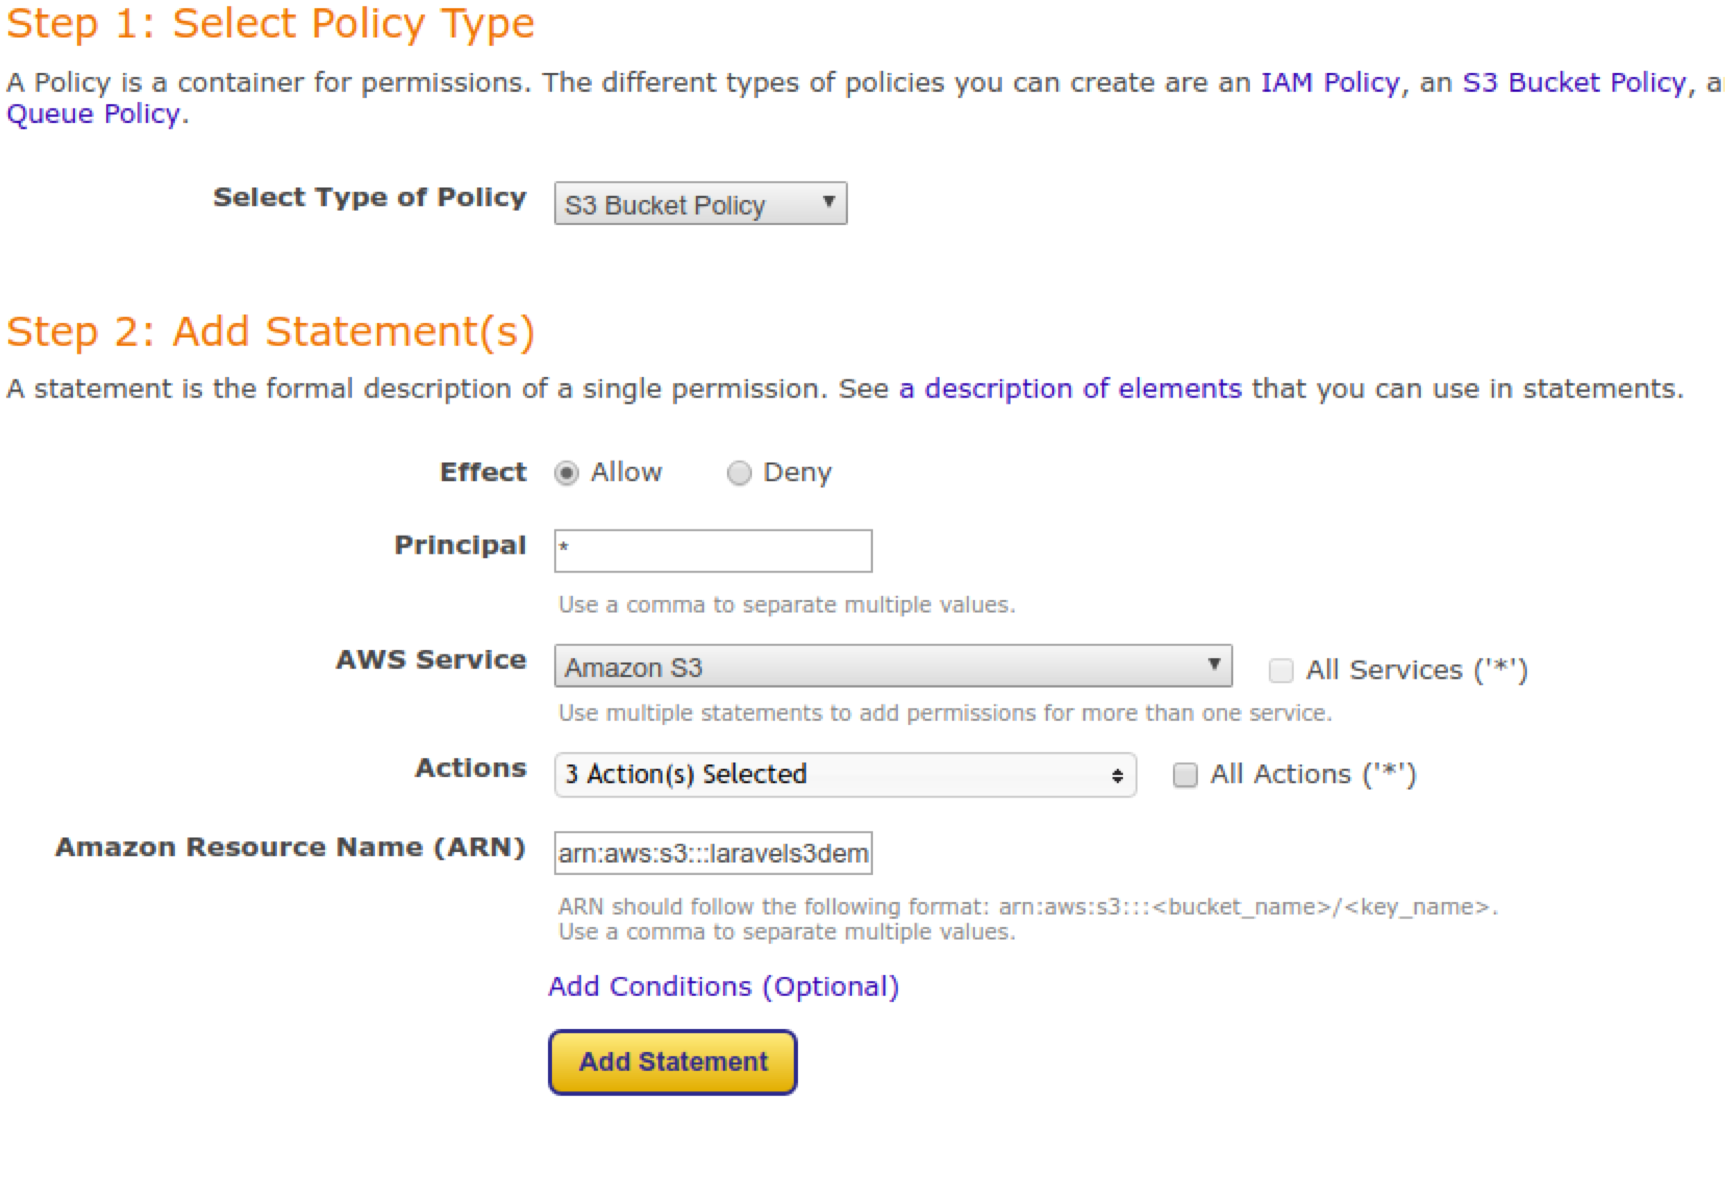
Amazon Resource Name ARM can be like this arn:aws:s3:::
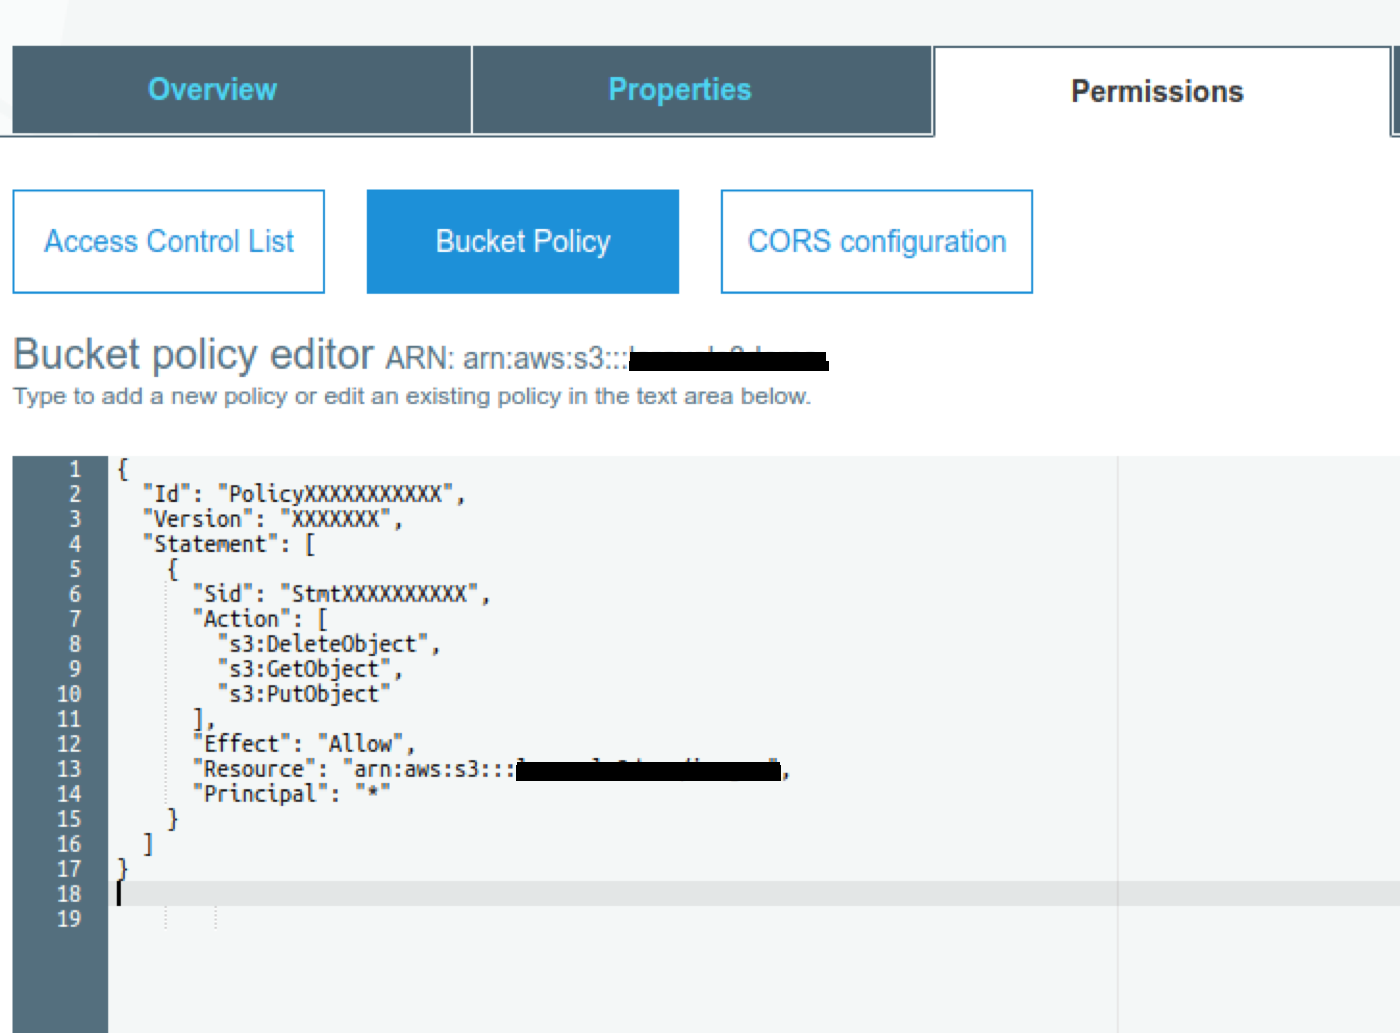
Below is an example bucket policy. Let's say your bucket name is "testbucket"
- {
- "Id":"PolicyXXXXXXXXXXX",
- "Version":"XXXXXXX",
- "Statement":[
- {
- "Sid":"StmtXXXXXXXXXX",
- "Action":[
- "s3:DeleteObject",
- "s3:GetObject",
- "s3:PutObject"
- ],
- "Effect":"Allow",
- "Resource":"arn:aws:s3:::testbucket",
- "Principal":"*"
- }
- ]
- }
This json result will need to be put in the Bucket Policy tab of your bucket settings.
3. Now go to your bucket in Amazon S3, and put this json in the bucket policy section.
That should be all :) Write to us at [email], if you still have questions.